GETTING STARTED
Create your PayHr account
Your PayHr account is your personal sign-in. It is separate from the business workspaces you create or join, so one account can manage several businesses and also open your own employee portal. This guide covers each sign-up screen and why it is there.
It takes about a minute. All you need is access to the email inbox you want to sign in with.
 NARRATED TUTORIALWatch: Create your PayHr accountSee every step below in the actual PayHr screens, with captions.
Before you start
- A work email address you can open right now (the code arrives there)
- The first and last name you want your team to see
- Optional: a phone, computer or password manager that supports passkeys
01Sign up with your work email
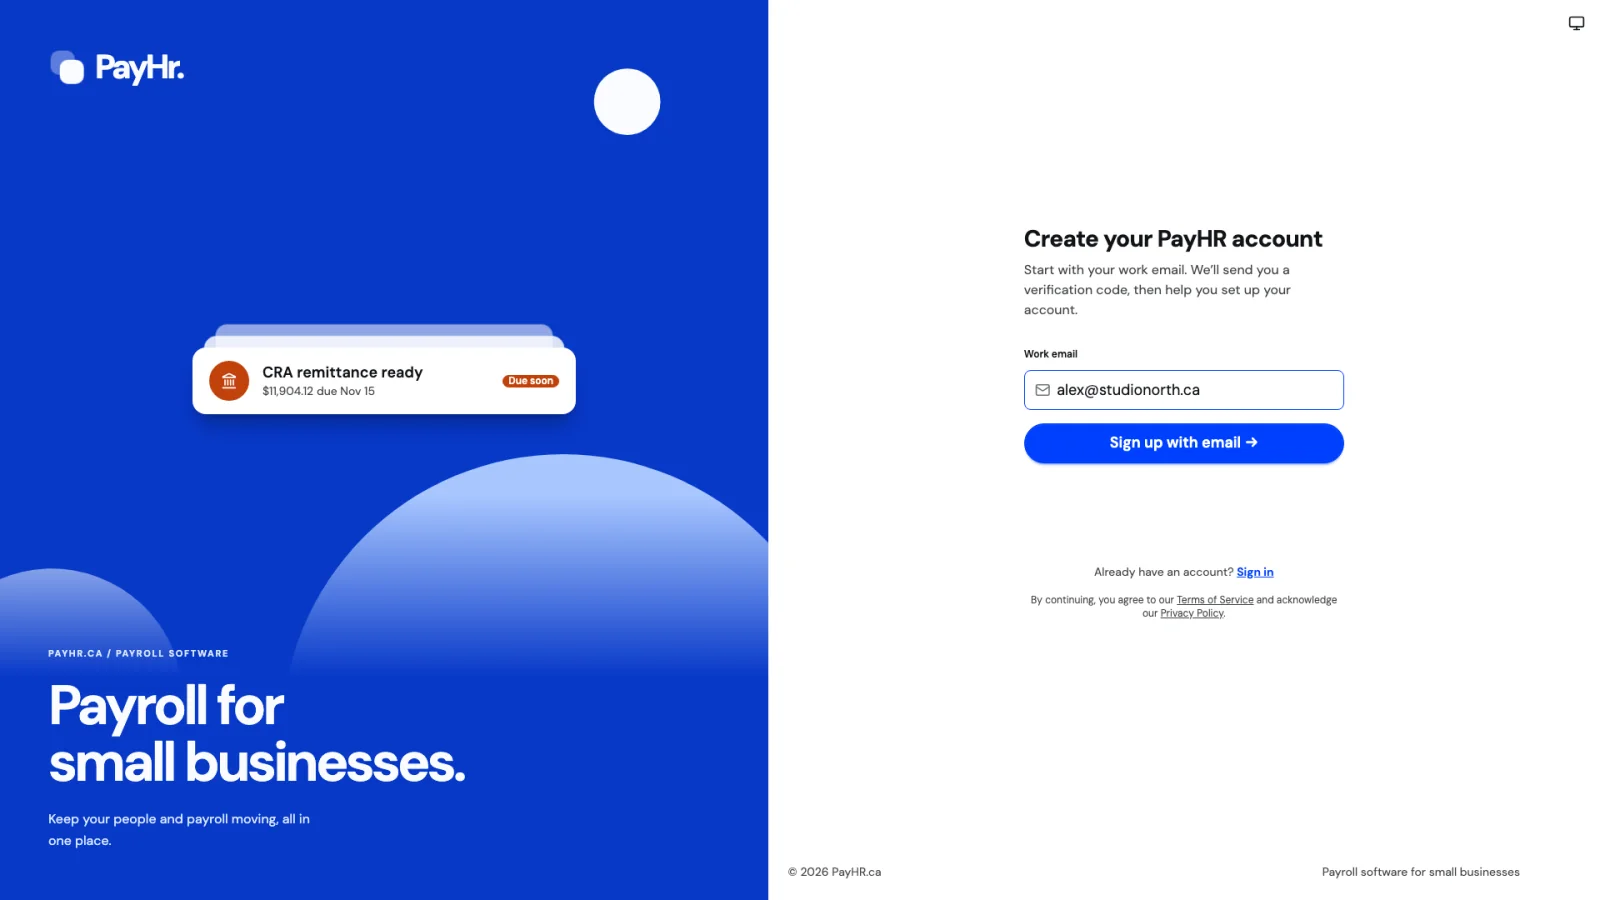
Go to payhr.ca and choose Get started. On Create your PayHR account, enter your Work email and select Sign up with email.
PayHr doesn’t use passwords. Each time you sign in, you prove it’s you with a one-time code sent to this email, or with a passkey. There is nothing to remember, reuse or leak.
- Use an address you will keep. It is how you sign in and how teammates invite you to workspaces, since invitations only work for the invited email.
- A short security check may run in the background to block automated sign-ups.
- By continuing, you agree to the Terms of Service and acknowledge the Privacy Policy linked under the button.
02Enter your verification code
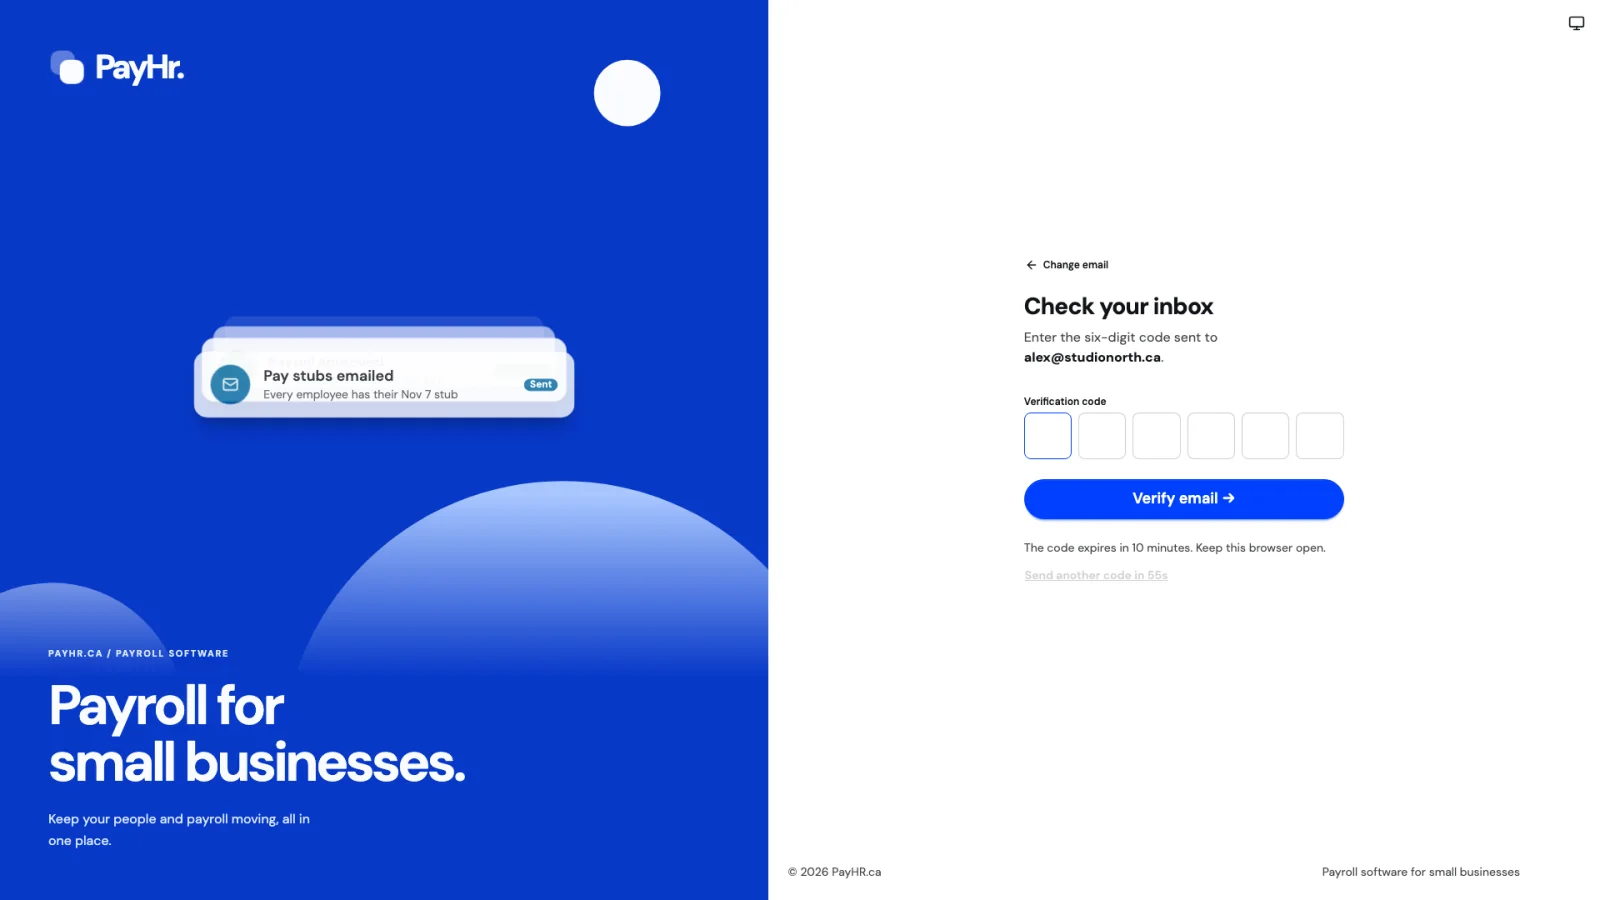
Check your inbox shows the address the code was sent to. Type the six-digit code from the PayHr email, or paste it into the first box, then select Verify email.
- The code expires in 10 minutes. Keep this browser tab open while you check your email.
- Always use the most recent code. Requesting a new code replaces the earlier one.
- No email? Check spam or junk, and confirm the address is right. If it isn’t, choose Change email. Otherwise wait for Send another code to become available. Requests are rate-limited to protect your account.
- Never share a code with anyone. PayHr staff will never ask for it.
03Add your name
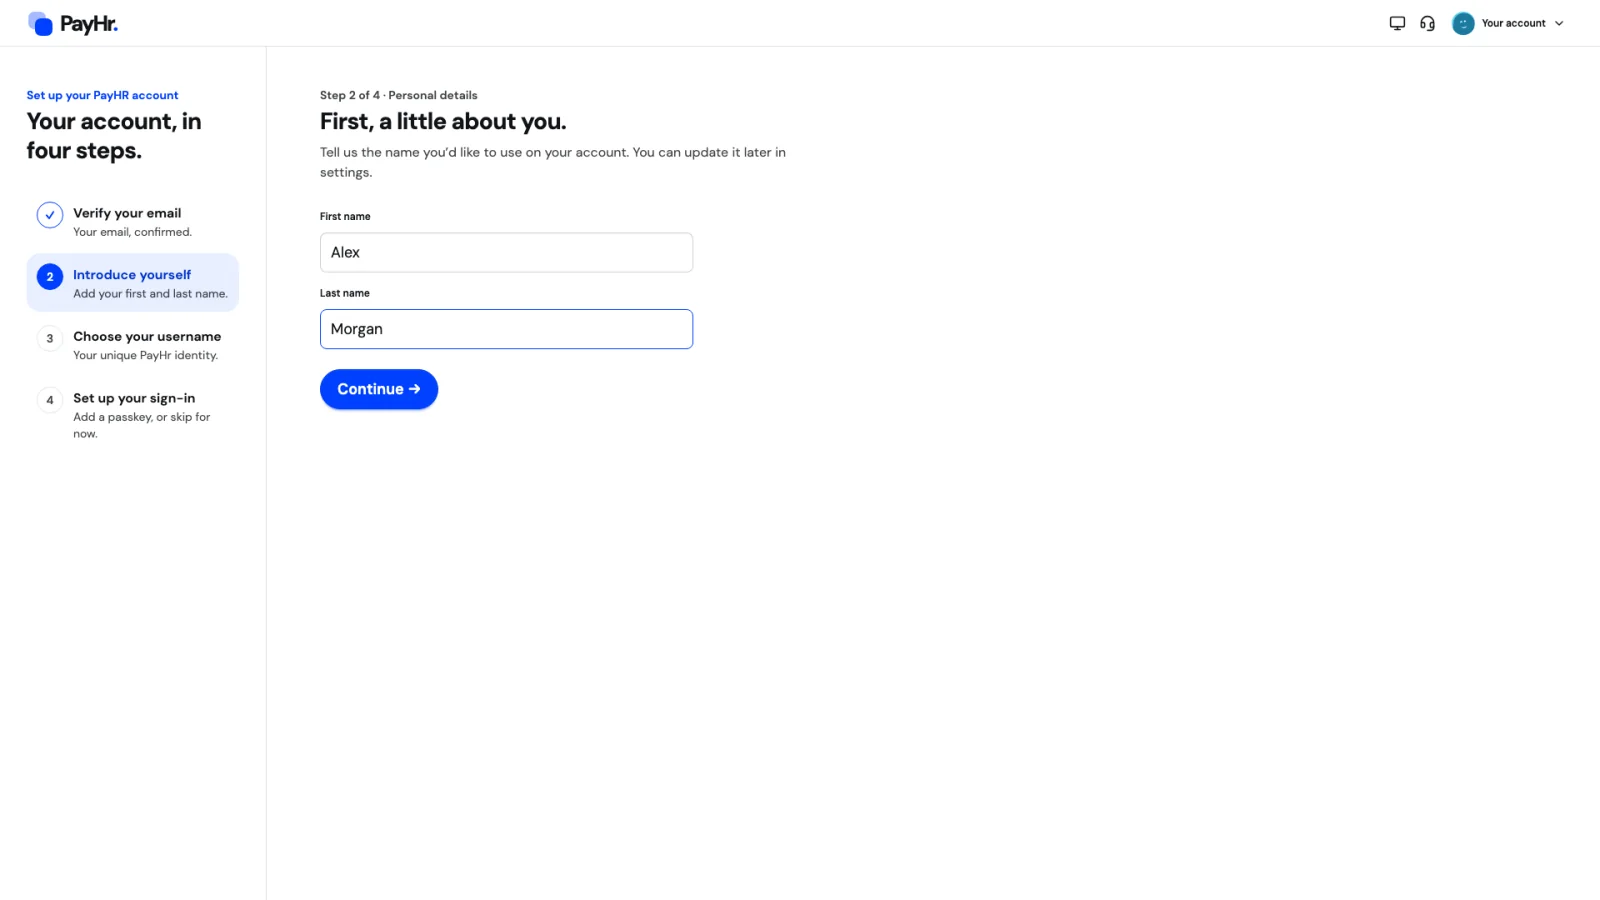
Account setup has four short steps, shown on the left. After verifying your email, First, a little about you asks for your First name and Last name.
This is how you appear to teammates and in workspace activity, such as approvals and setting changes, so use your real name. You can update it later from Account settings. Select Continue.
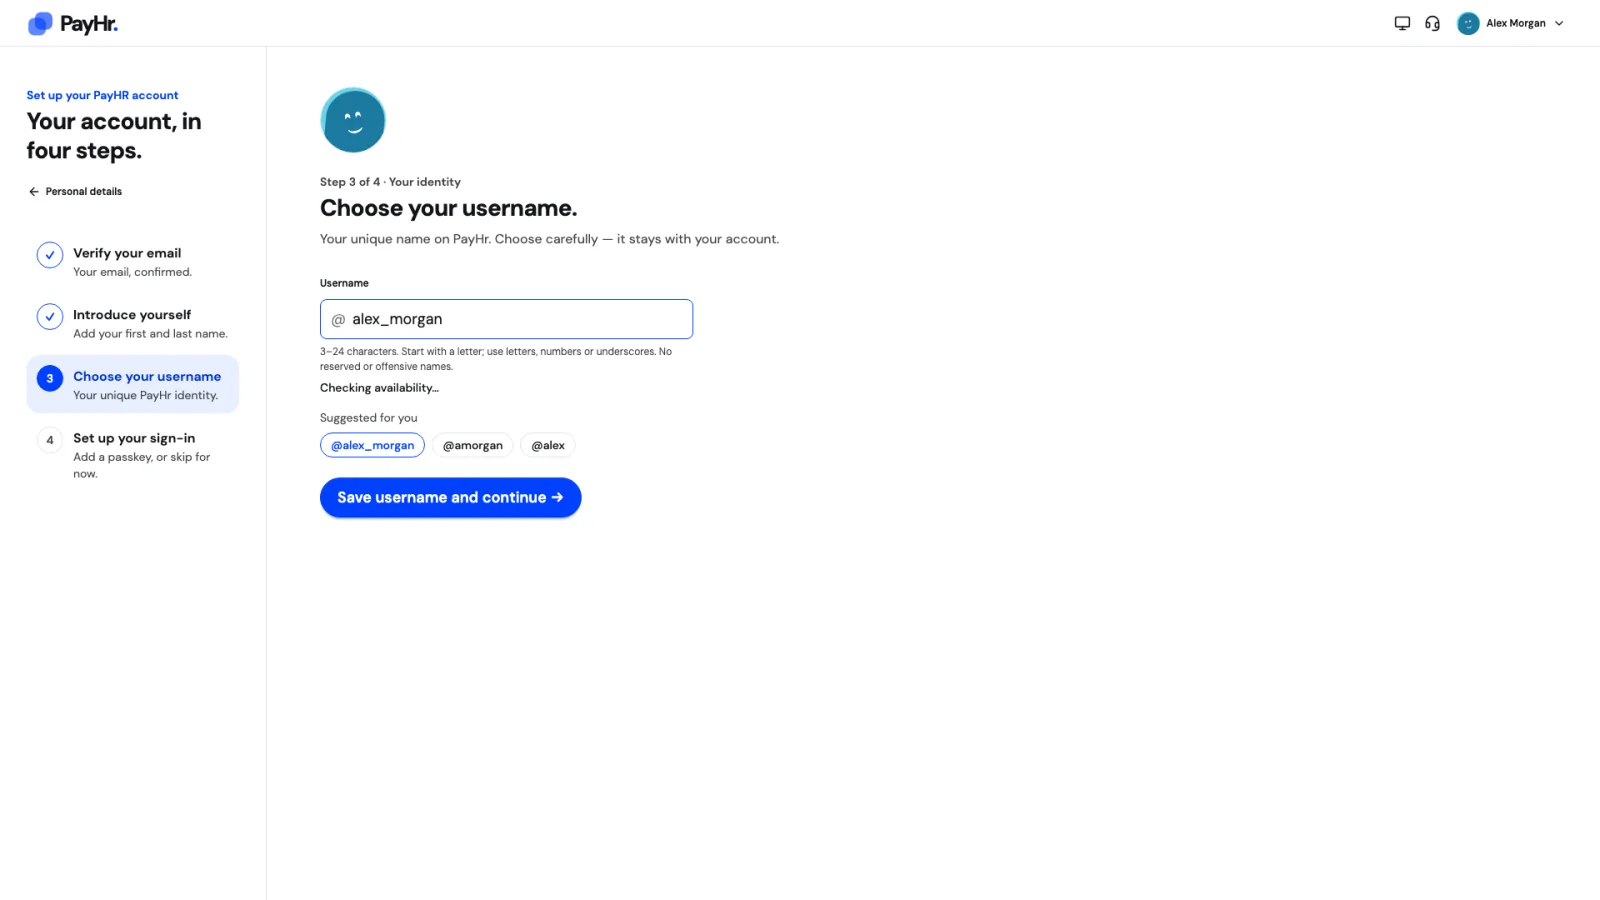
04Choose your username
Choose your username sets your unique name on PayHr, shown as @username to teammates. PayHr suggests a few under Suggested for you based on your name, or you can type your own.
- 3 to 24 characters, starting with a letter. Letters, numbers and underscores only.
- Reserved and offensive names aren’t allowed. PayHr tells you whether a name is available as you type.
- Choose carefully: your username stays with your account.
Select Save username and continue.
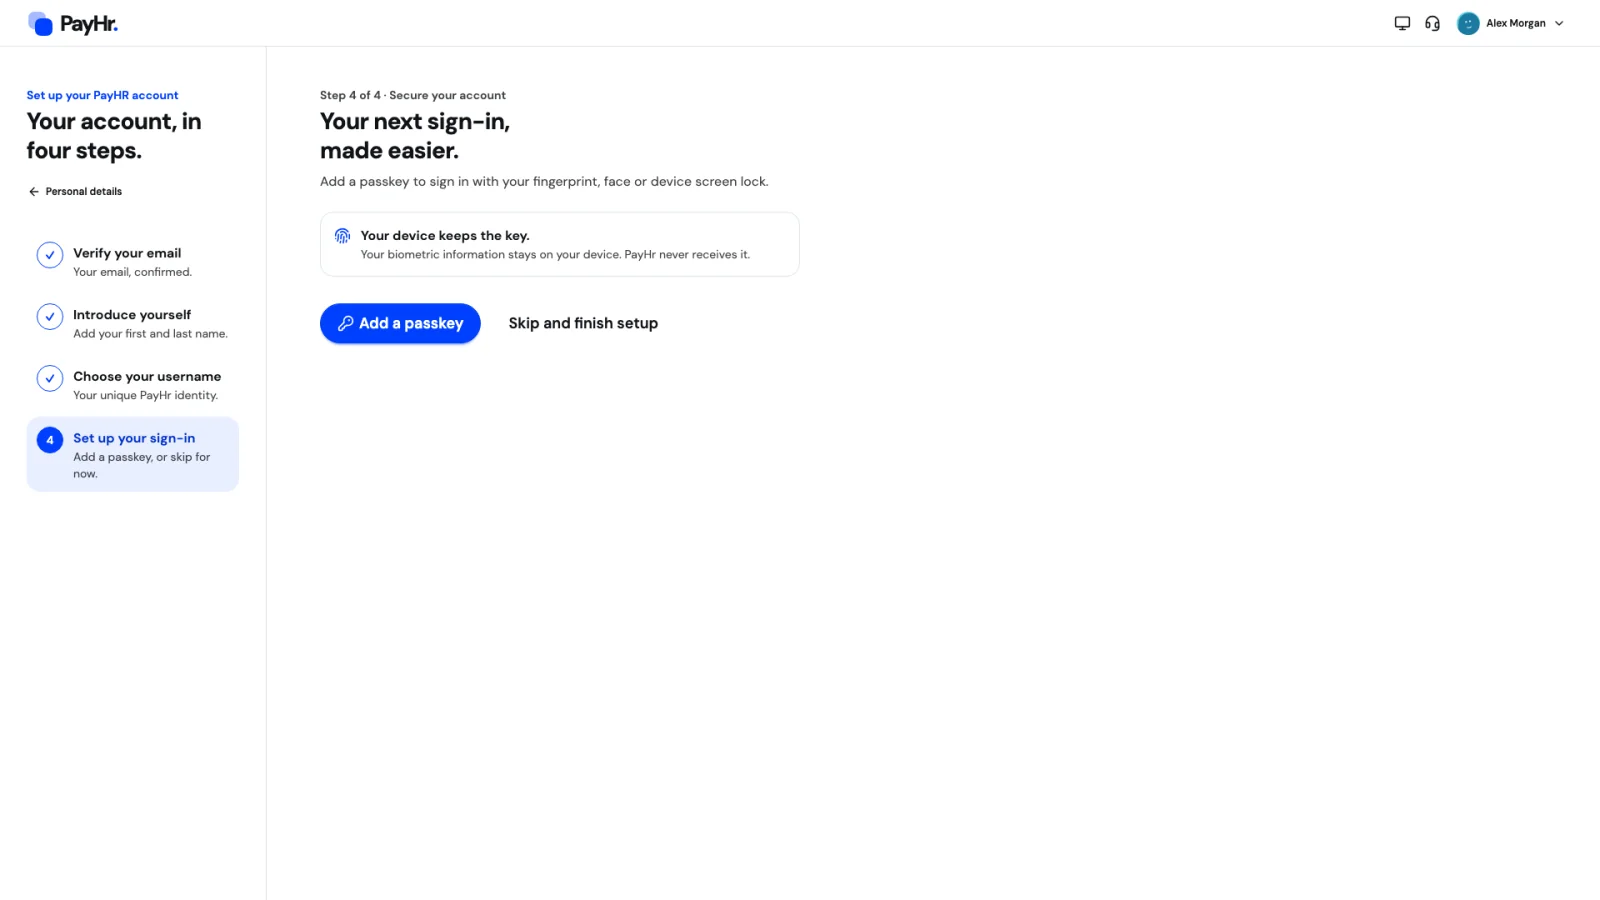
05Add a passkey, or skip for now
A passkey lets you sign in with your fingerprint, face or device screen lock instead of waiting for an email code. Your biometric information stays on your device, and PayHr never receives it. Passkeys are tied to payhr.ca, so they can’t be phished by a look-alike site.
- Select Add a passkey and follow your device’s prompt. Your browser, phone or password manager stores the key.
- Not ready? Select Skip and finish setup. You can add passkeys any time from Account settings → Passkeys, and you can always sign in with an email code.
Some sensitive changes, like changing your email or replacing a passkey, ask you to verify with your passkey first if you have one.
06Go to your workspaces
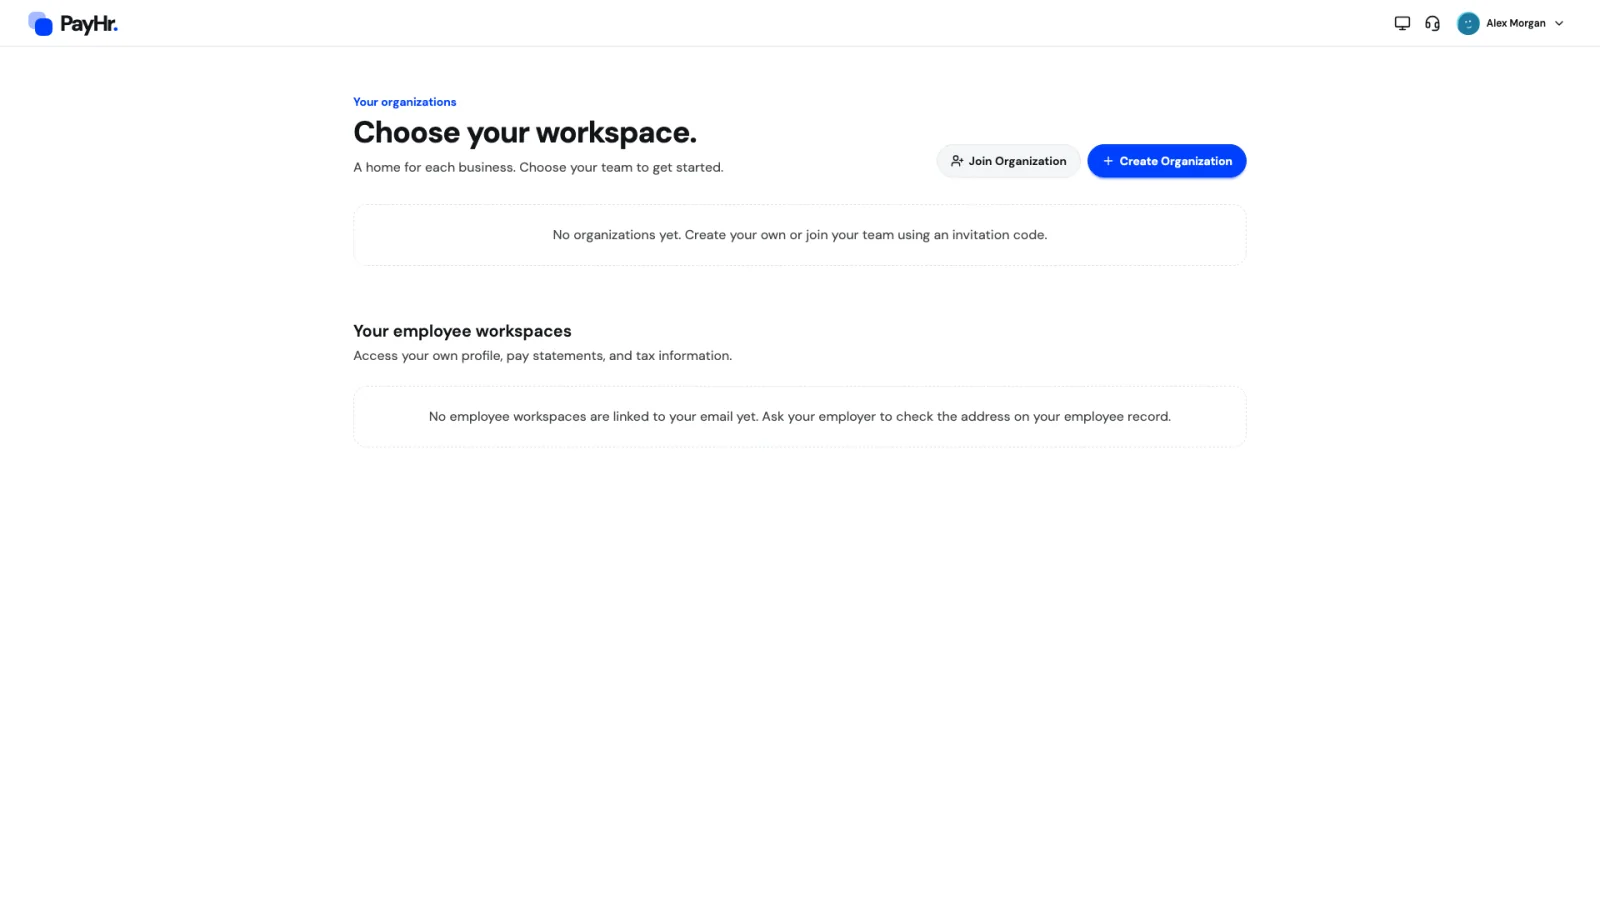
Setup is complete. You land on Choose your workspace, which lists every business you belong to and, further down, Your employee workspaces for your own pay statements and tax information.
- Running payroll for your own business? Select Create Organization and follow Set up your business workspace.
- Invited by your employer or a colleague? Select Join Organization and enter the code from your invitation email. You must be signed in with the email address that was invited.
Questions people ask
Why doesn’t PayHr use passwords?
Passwords get reused, guessed and phished. One-time email codes and passkeys prove you control your email or device each time, so there is no stored password to steal.
I didn’t get my code. What should I do?
Check your spam or junk folder and confirm you typed the email correctly. If needed, choose Change email, or wait for Send another code. Use only the newest code. If emails still don’t arrive, ask your IT team whether messages from payhr.ca are being blocked.
Can I change my username later?
Plan to keep it. Your username stays with your account, so choose one you are happy for teammates to see. You can change your first and last name any time in Account settings.
Can I change the email I sign in with?
Yes, from Account settings → Email address. You approve the change with a code sent to your current email, then verify a code sent to the new one. Afterwards you are signed out on every device. Email changes are limited to once every 30 days.
Do my employees need a PayHr account?
Only if they use PayHr themselves, for example to see their pay statements in the employee portal or to help run payroll as a teammate. Each person signs up with their own email.