PEOPLE & RECORDS
Keep employee documents
Each employee’s page has a Documents section that keeps their files in one secure table: documents you upload, signed TD1 forms, payroll records from before PayHr and issued Records of Employment. This guide covers uploading, previewing, reminders, attaching documents signed through document signing, and asking an employee for a file. Owners and admins can manage documents.

 NARRATED TUTORIALWatch: Manage employee documentsSee every step below in the actual PayHr screens, with captions.
Before you start
- The employee already added in PayHr
- The file to upload as a PDF, JPEG or PNG, under 10 MB
- An expiry or renewal date, if the document has one (a permit, licence or certificate)
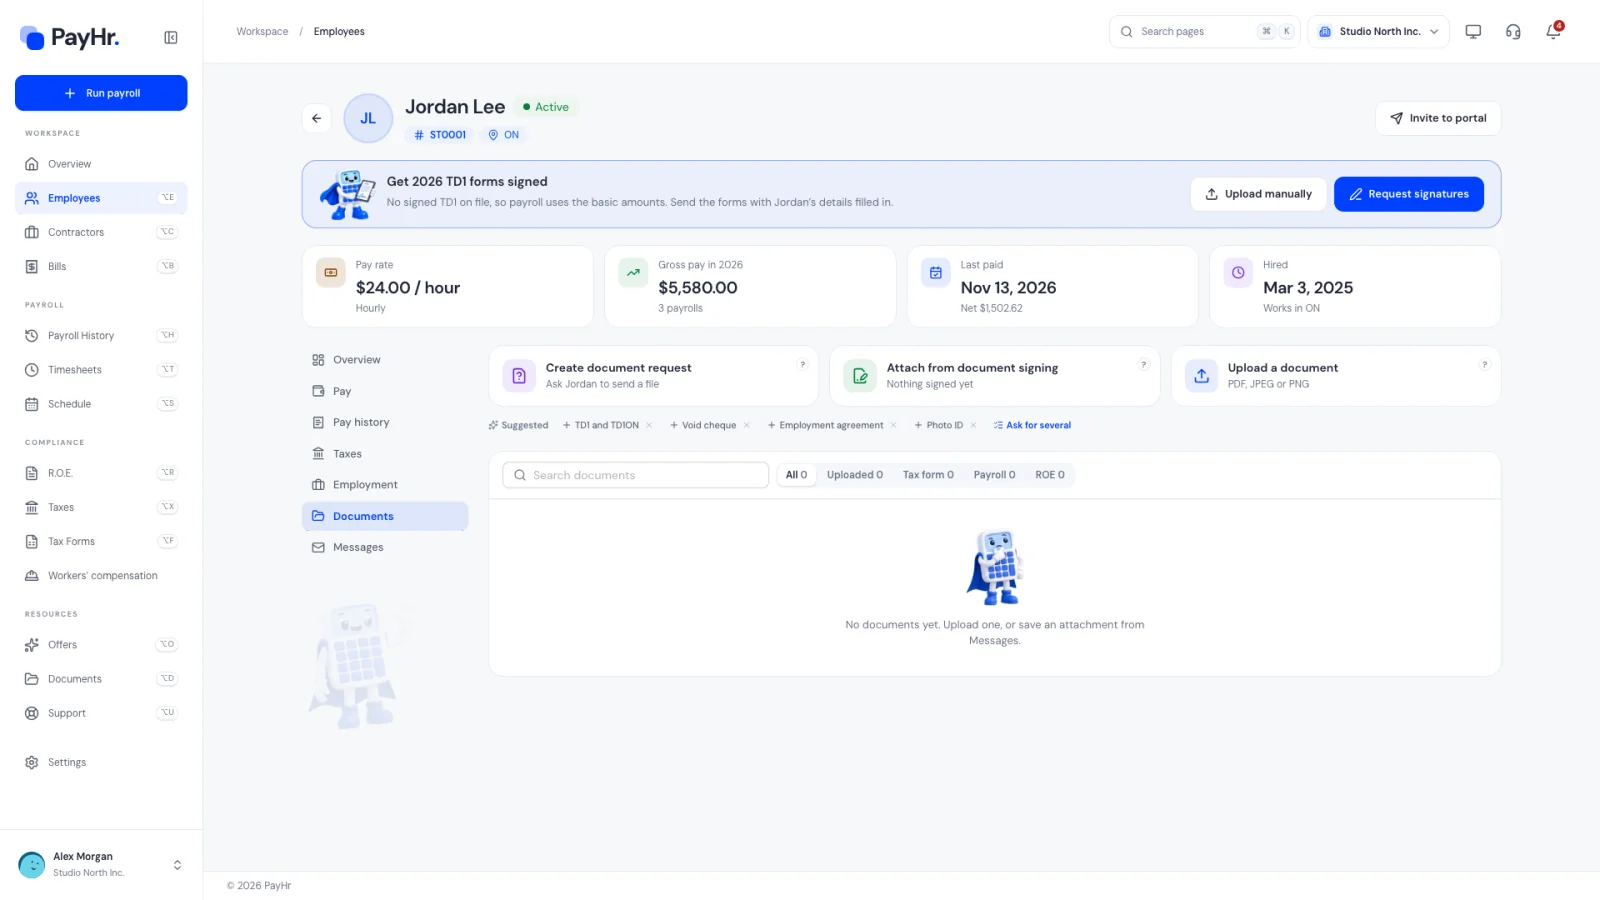
01Open the employee’s Documents section
Go to Employees, select the employee’s name, then choose Documents in the menu on the left. (You can also choose Documents from the … menu on their row in the Employees table.)
Three cards at the top are the ways to add a file: Create document request (ask the employee to send one), Attach from document signing (copy in something they signed) and Upload a document (a file you already have). Below them, Suggested chips list documents employers usually collect from a new hire, such as TD1 forms, a void cheque, an employment agreement or photo ID. A work permit is suggested first when the employee’s SIN starts with 9, which means they are a temporary resident. A chip’s × hides it in your browser.
02Upload a document
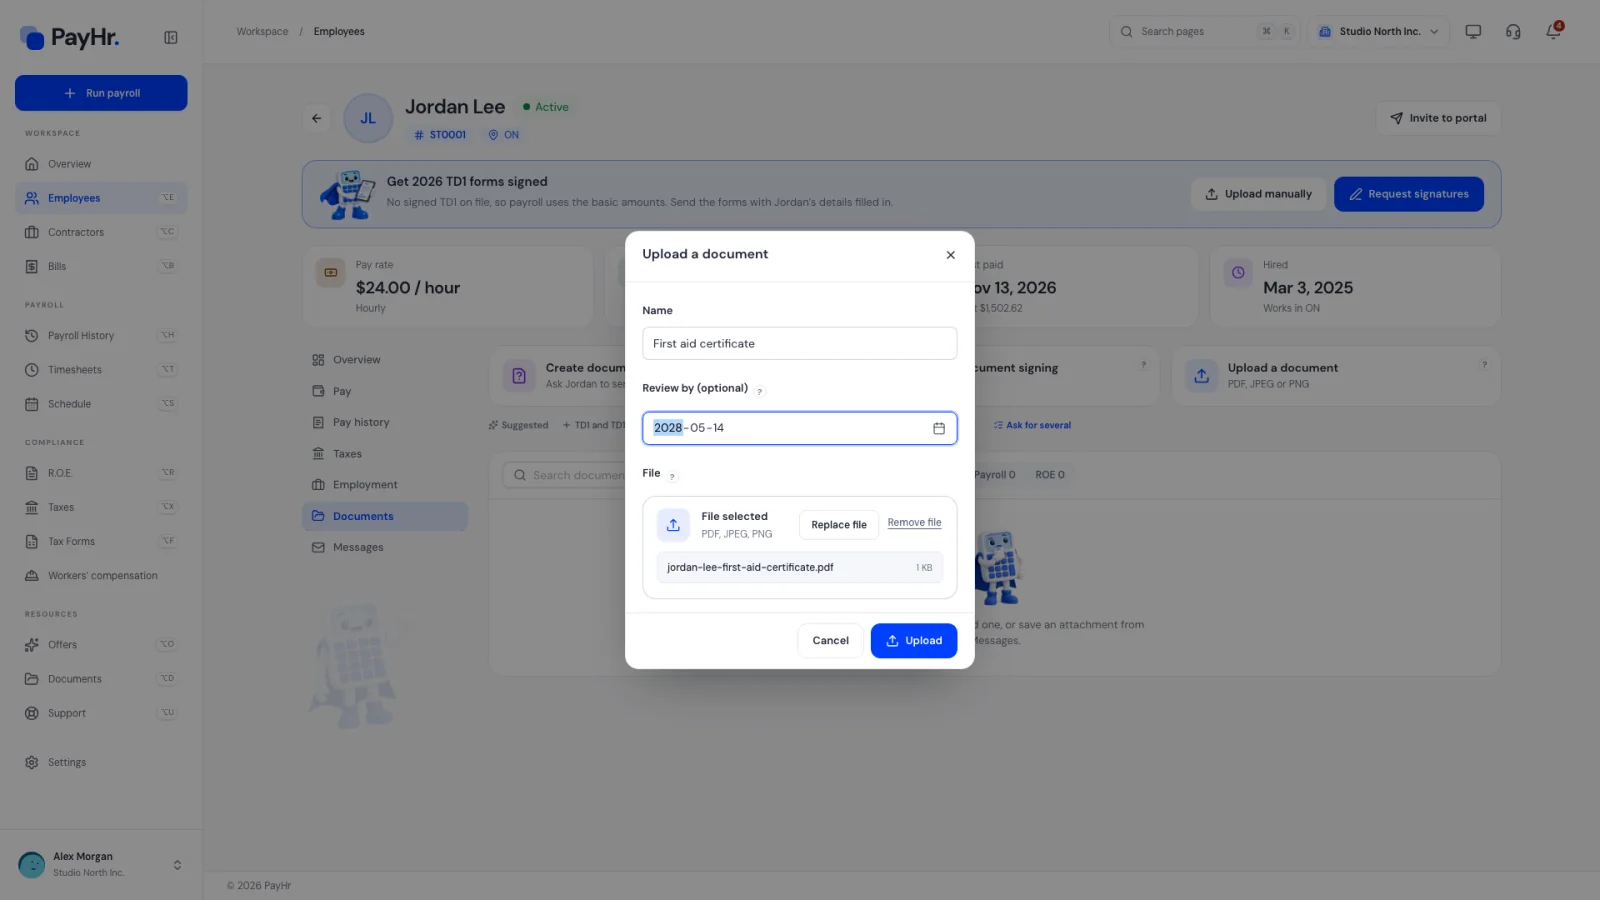
Select Upload a document. In the popup:
- Name: what the document is, for example Work permit or Signed employment agreement. This is what you will search for later.
- Review by (optional): a reminder date, for example when a permit, licence or certificate expires. Once the date arrives it is shown in red in the table, so you know to ask for a renewed copy.
- File: a PDF, JPEG or PNG up to 10 MB.
Select Upload. PayHr confirms Saved securely. Uploaded documents are visible only to your workspace’s owners and admins; the employee doesn’t see them in their portal.
03Find, preview and download documents
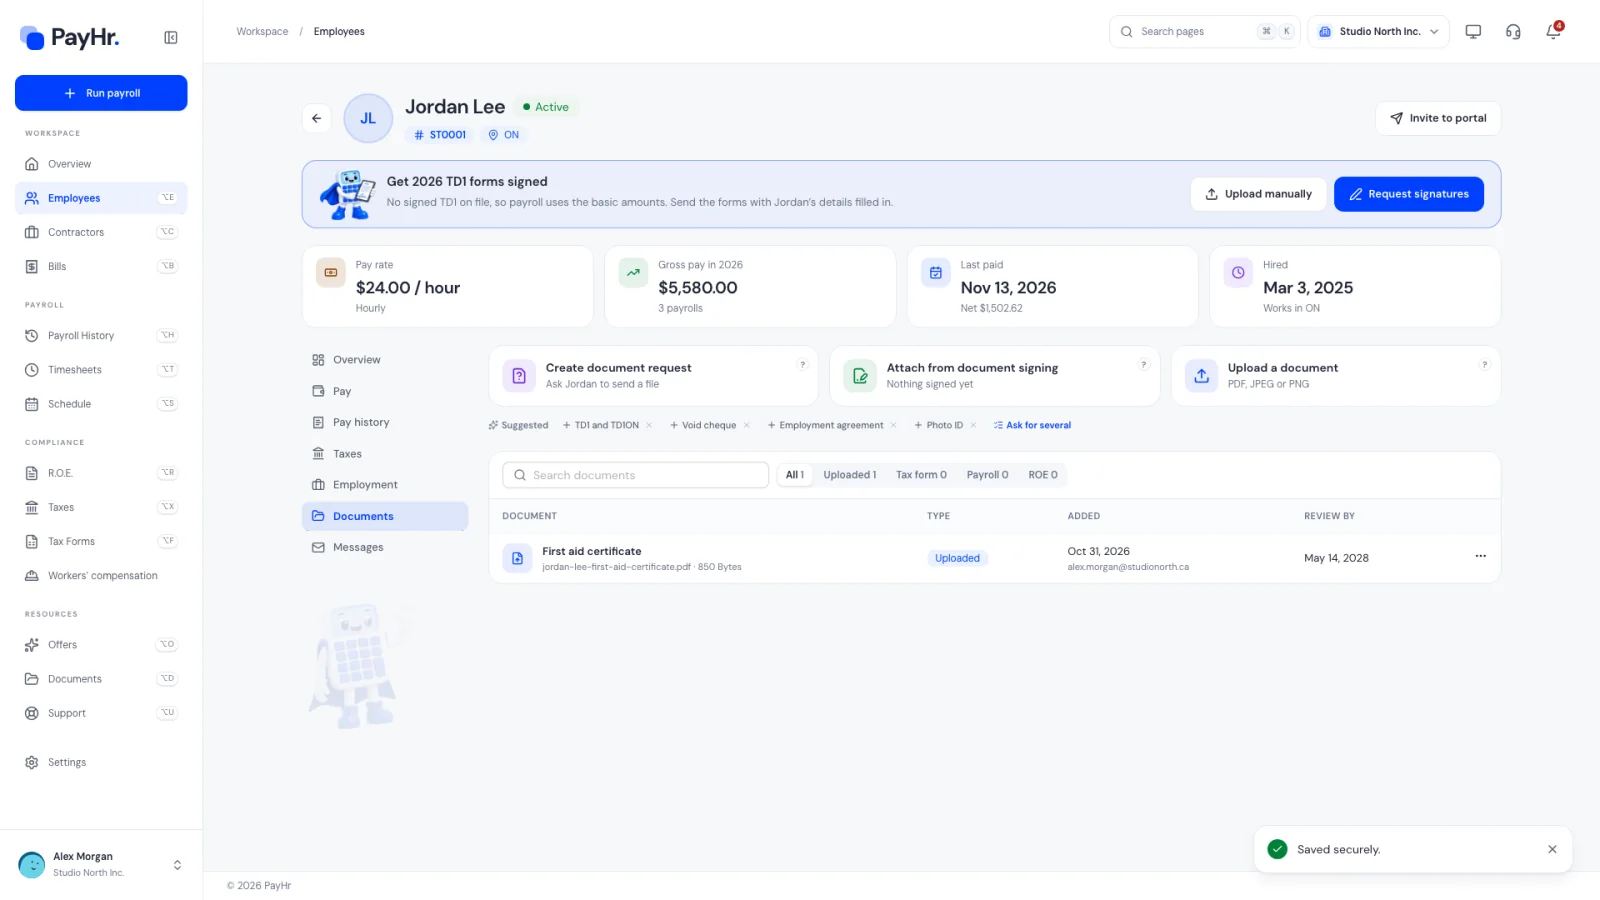
The table lists every document newest first, with its Type, when it was Added (and by whom, for uploads) and its Review by date. Types are:
- Uploaded: files you uploaded or saved from Messages.
- Tax form: signed TD1 forms recorded for each tax year, with the version number.
- Payroll: the payroll register from before PayHr, if you entered one.
- ROE: Records of Employment you issued, with a link to open the ROE.
Use Search documents or the type filters to narrow the list. Select an uploaded document’s name to preview it in a popup with a Download button; the … menu on each row also offers Download.
04Attach a document signed through document signing
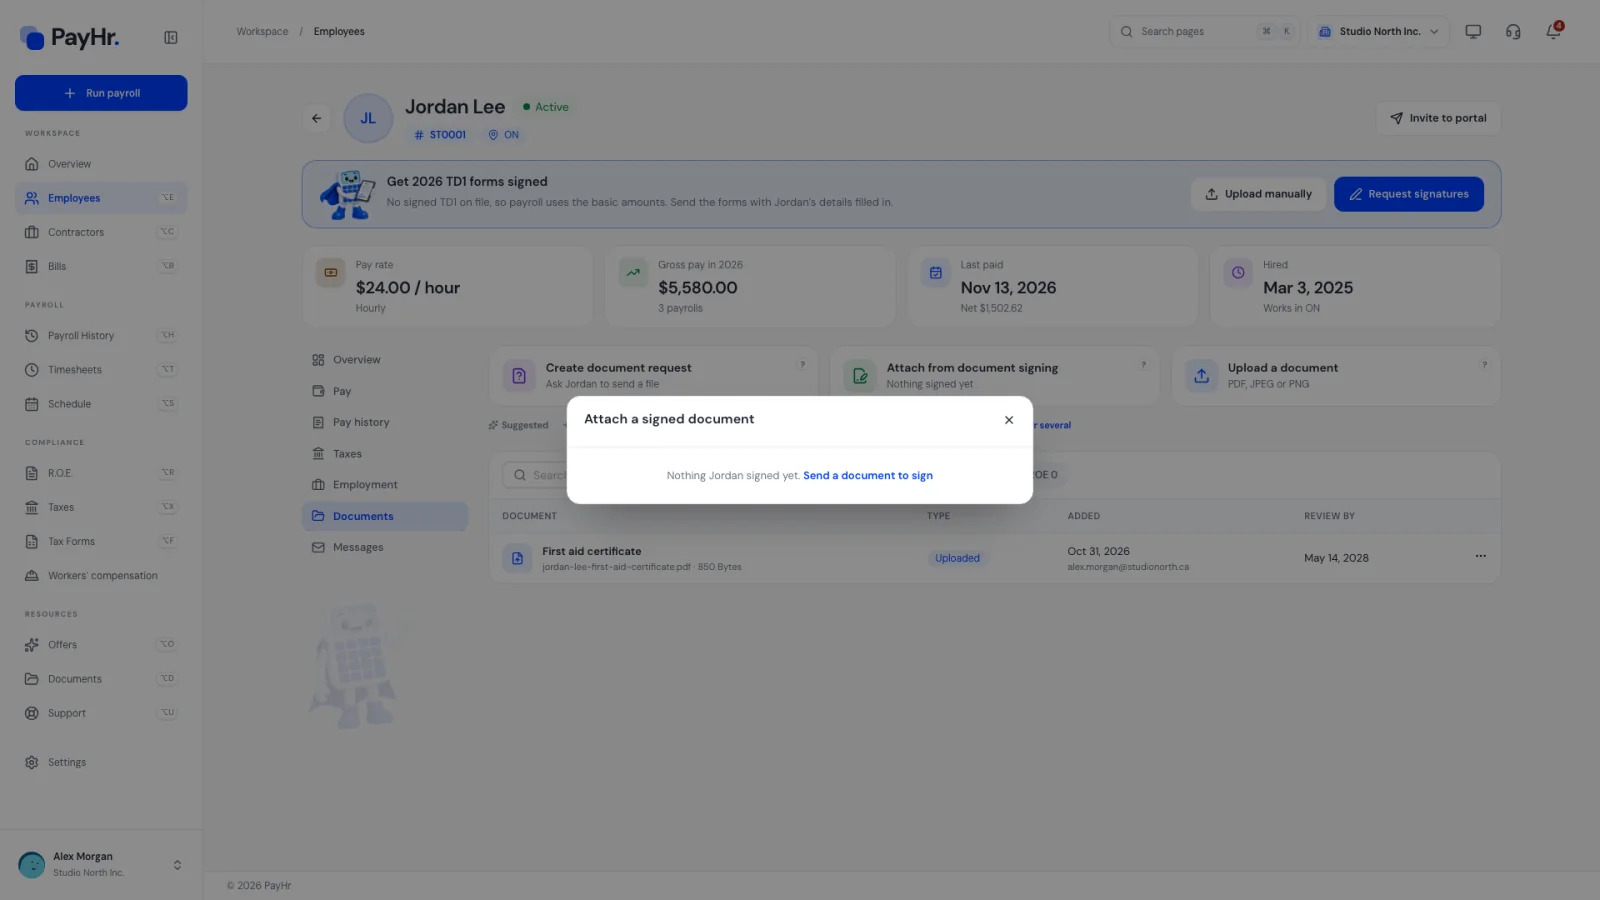
When you send an employee a document to sign from Documents (the e-signature module), the completed, sealed PDF stays there. To keep a copy on the employee’s file, select Attach from document signing. The popup lists every completed request this employee signed in your workspace, matched by their email address, with the date it was signed. Select Attach and the signed PDF is added to the table under the request’s title.
If nothing has been signed yet, the popup says so and links to Send a document to sign.
05Ask the employee for a document
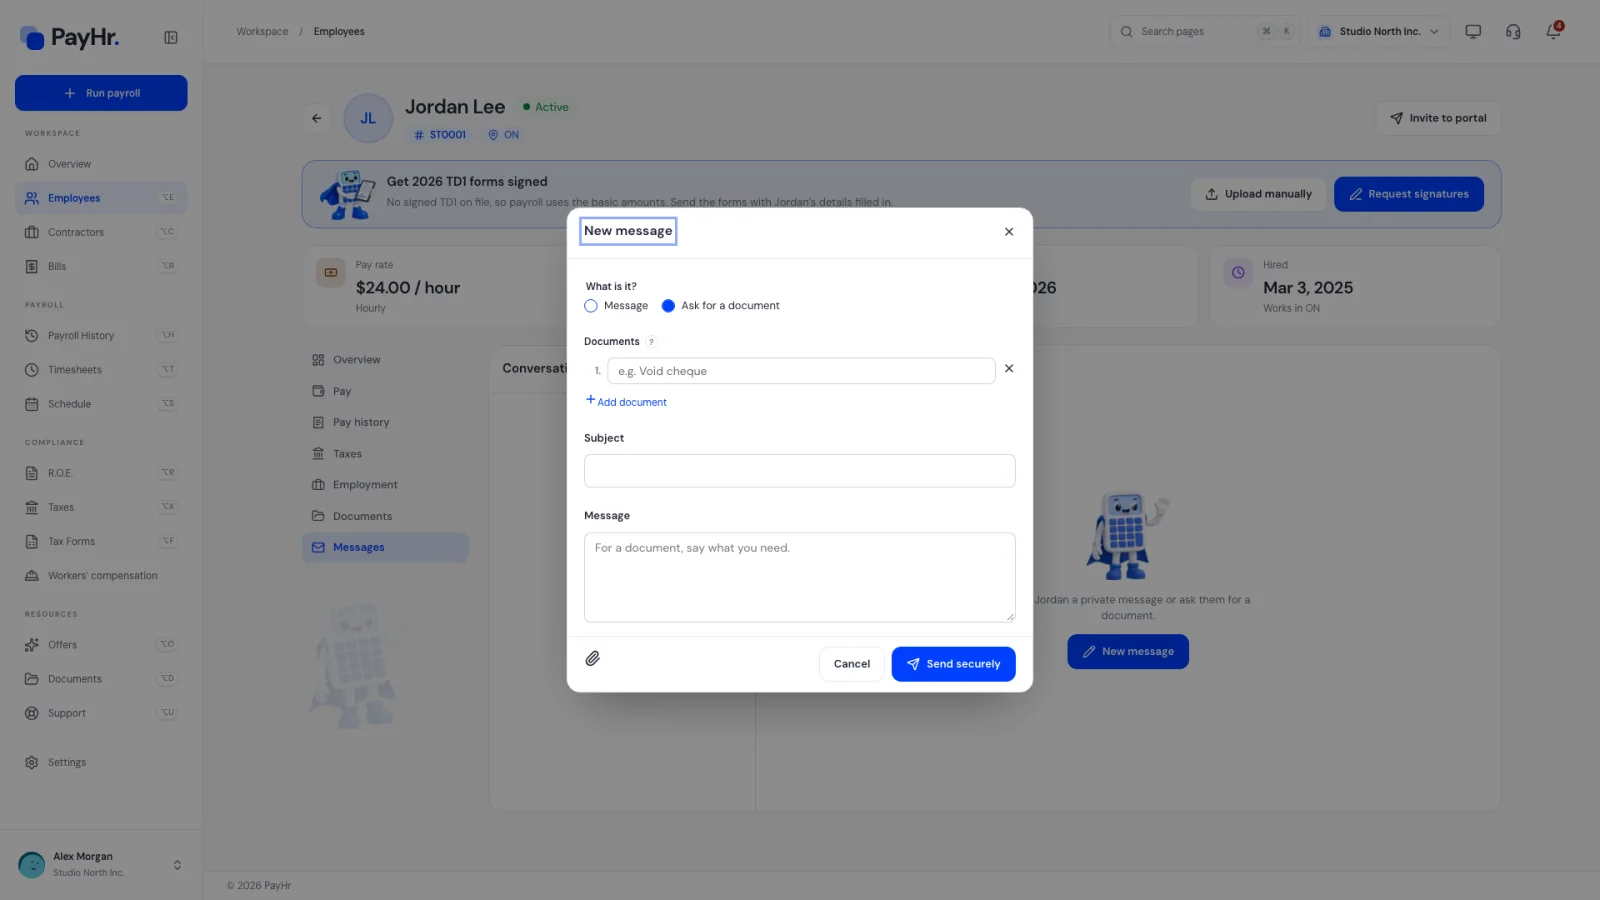
Select Create document request, or a Suggested chip to start with that document filled in. PayHr opens the employee’s Messages with a New message popup set to Ask for a document:
- Documents: one line per file you need; Add document adds a line. They all go in one request.
- Subject and Message: what you need and why. Suggestions come with a plain-language message, for example why a void cheque is needed.
Select Send securely. The employee gets an email and replies from their Secured mailbox in the PayHr employee portal, attaching a PDF, JPEG or PNG. When their file arrives in the conversation, select Save to secured documents, confirm the Document name and an optional Review date, and it joins the Documents table.
Questions people ask
Can the employee see the documents I upload?
No. Documents in this section are visible to your workspace’s owners and admins. The employee sees their own messages and attachments in their Secured mailbox, and their pay and tax information in the portal.
What happens when a review date passes?
The date is shown in red in the Review by column so you can follow up. It is a reminder only: the document stays on file.
Why does a signed TD1 appear here?
When an employee signs their TD1 forms through PayHr, or you upload signed forms on their Taxes page, the signed PDF is saved with that tax record and listed here as a Tax form.
Where do documents I send for signature go?
Requests and their sealed PDFs live in the Documents module in the sidebar. Use Attach from document signing to copy a signed copy onto the employee’s file.
Which file types can I upload?
PDF, JPEG and PNG files up to 10 MB each.