TAXES & COMPLIANCE
File your T4 slips with the CRA
Once PayHr has prepared your slips, you file them with the Canada Revenue Agency (CRA). There are three ways to do it, and each has a short narrated video. This guide is for owners and admins. You need your CRA My Business Account sign-in.

Before you start
- Your T4 (and T4A) slips prepared in PayHr from Taxes > Tax Forms
- Your CRA My Business Account sign-in
- Your CRA payroll account number (it ends in RP0001)
01Choose how to file
In PayHr, open Taxes, choose Tax Forms and open the tax year. Under the question about how you want to file your slips, pick one way and select Save filing choice. You can change it later.
- File manually (free): you type each slip into CRA Web Forms, copying from PayHr's box sheet.
- Auto issue, Do it yourself in one go: you download one CRA XML file from PayHr and upload it to the CRA. Every slip goes in at once.
- Auto issue, Let a PayHr rep do it: you add PayHr as your representative once, and our team files for you.
Auto issue is $5 per slip, and free on the Automated Pay plan. NR4 slips are always filed by hand and are free. T4 and T4A slips are due by the last day of February.
02File manually with CRA Web Forms (free)
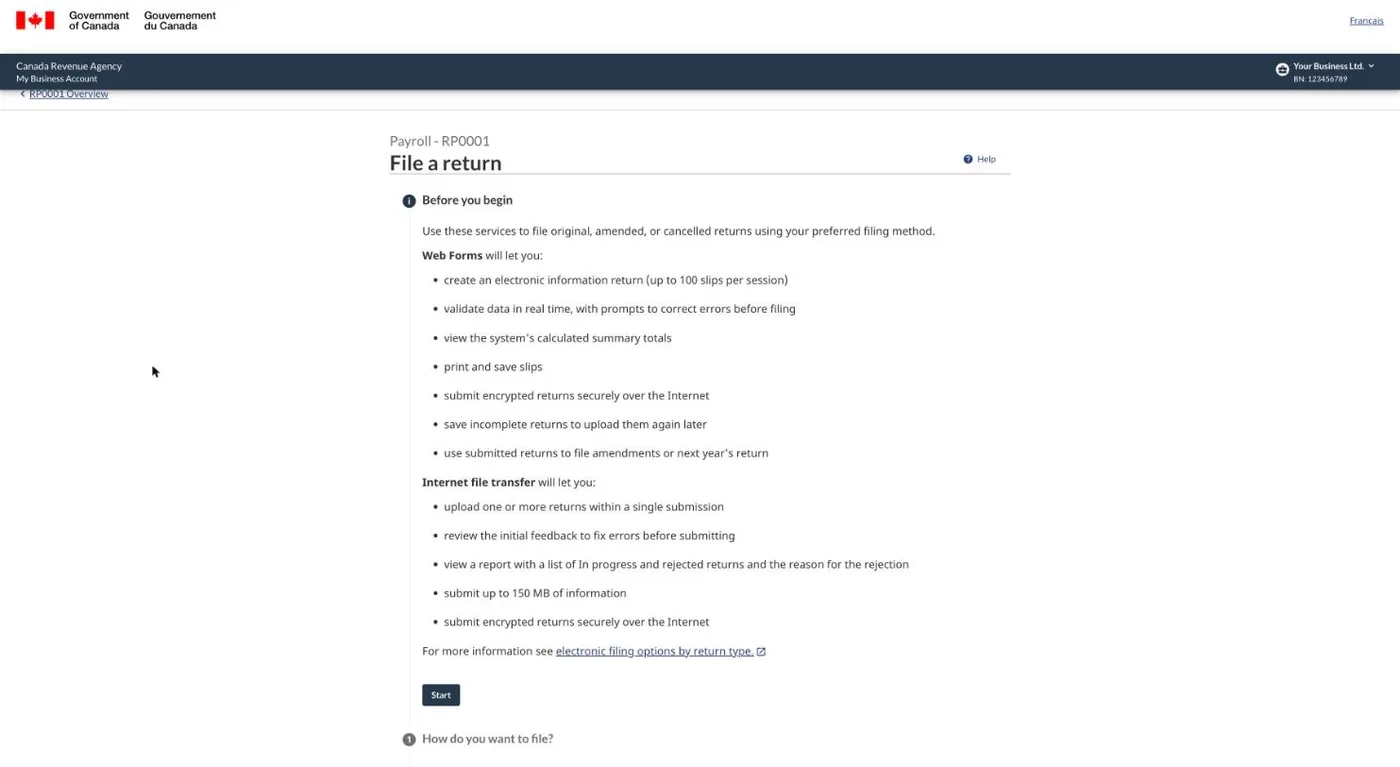
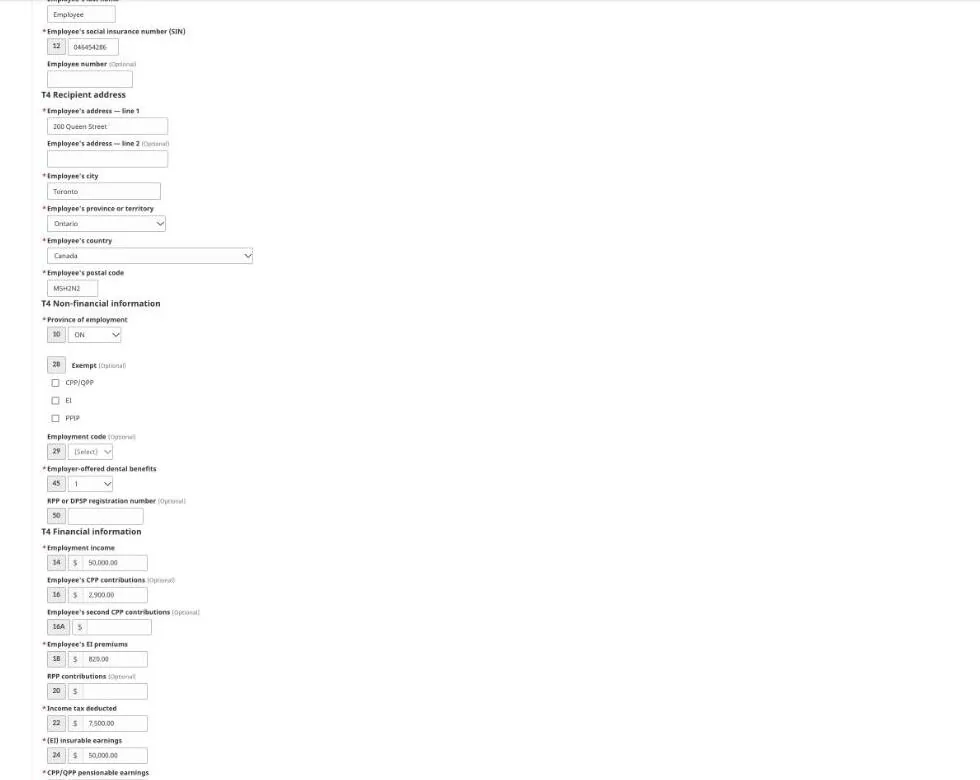
Sign in to My Business Account, open Payroll, then your RP account. On the Returns tab, select File a return and choose Web forms. Fill in the transmitter, return and employer details, then type each slip from PayHr's box sheet: box 12 (SIN), box 10 (province), box 28 (exemptions), box 45 (dental) and the amounts in boxes 14, 16, 18, 22, 24 and 26. Add any other information codes, select Validate, and repeat for each employee. Check the T4 summary against your box sheet and submit.
03Do it yourself: upload one XML file
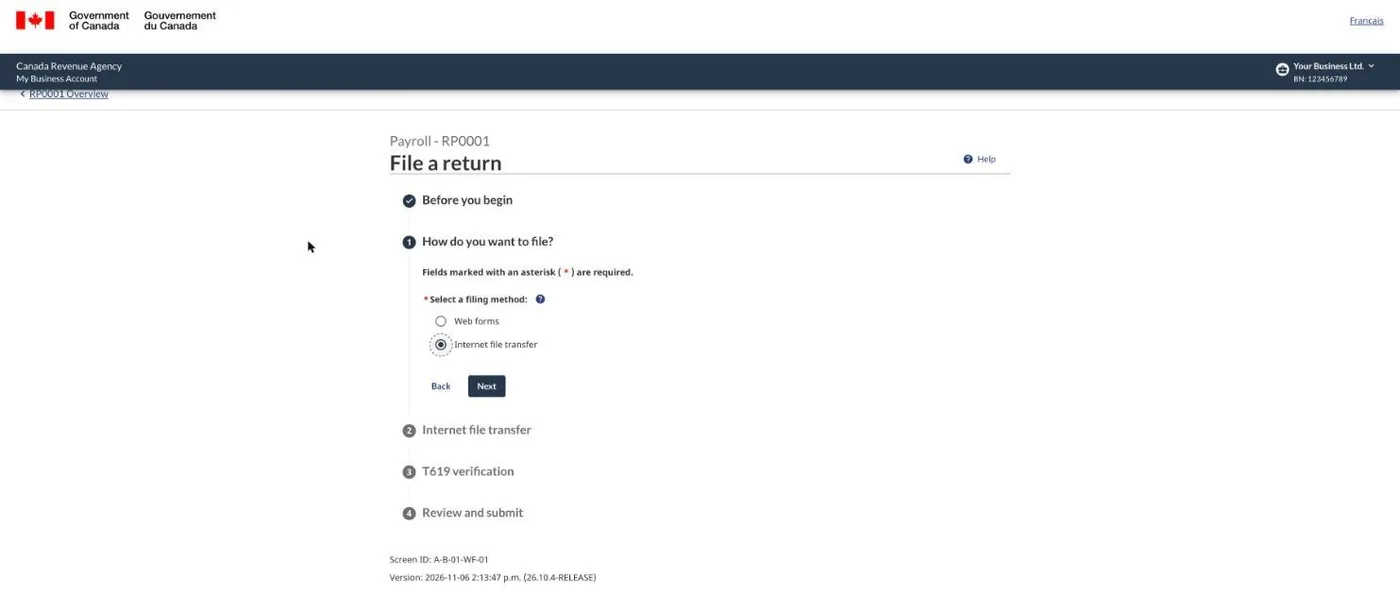
In PayHr, select Download CRA XML. The file holds every slip and the summary. In My Business Account, open Payroll, your RP account, the Returns tab and File a return. Choose Internet file transfer, attach the file, check the T619 transmitter details the CRA reads from it, tick the certification and submit.
04Let PayHr file: add PayHr as your representative
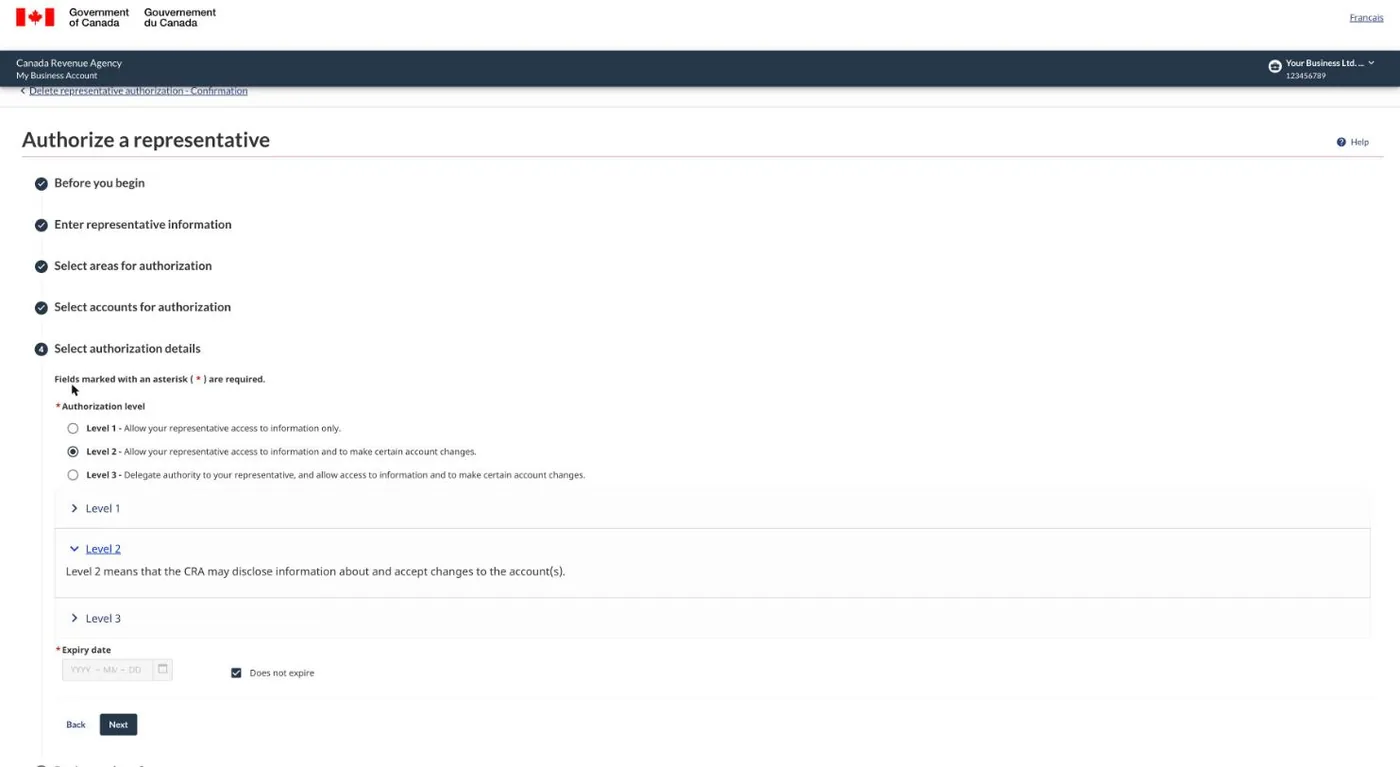
In My Business Account, open Profile. On the Authorized representatives card, select Add. Paste PayHr's RepID (copy it from your PayHr guide) and select Search. Choose Payroll (RP) accounts only, then All RP accounts, Level 2 and Does not expire. Review and submit.
Back in PayHr, select I've added PayHr as my representative. You only do this once, and you can remove PayHr at any time from the same CRA page.
05After filing: confirmation number and employee slips
The CRA shows a confirmation number when you submit. It is your proof of filing.
- XML upload: paste the confirmation number into PayHr. PayHr then emails each employee their slip and adds it to their employee app.
- PayHr rep: our team confirms access, files the return and emails you the CRA confirmation number. Slips go to employees automatically.
- Web Forms: enter the confirmation number in PayHr. Save each slip from the CRA as a PDF and upload it for that employee in PayHr. We email it to them and add it to their app.
Questions people ask
Which way should I choose?
If you have a few employees and don't mind typing, Web Forms is free. The XML upload sends every slip at once in a few minutes. Adding PayHr as your representative is the least work: you authorize PayHr once, and our team files for you.
How much does it cost?
Filing manually with Web Forms is free, and so are NR4 slips. Auto issue (the XML upload or a PayHr rep) is $5 per slip, and free on the Automated Pay plan.
Can I remove PayHr as my representative?
Yes. In My Business Account, go to Profile, view your authorized representatives, choose PayHr's representative and cancel the authorization.